Dog

Dog

Friday 31 March 2017

Glass Bead Gel

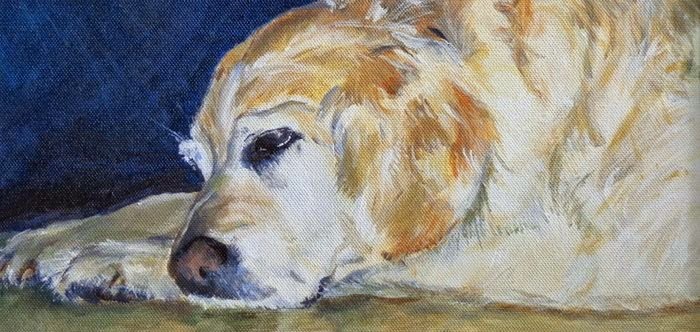
Detail of  "Turtles" showing the effect of the glass bead gel underneath layers of acylic paint

Blog 13

For ages I have had a jar of Glass Bead Gel which I always wanted to use. This week's blog encouraged me to finally take the plunge to get going. The white gel is made with genuine glass beads and dries transparent. The reflective surface appears bubbly because of the beads.

The gel can be used as a topcoat or in a layer under the paint to create texture. It can be mixed with all acrylic colours but works best with transparent or translucent colours if you want to keep the reflective properties.

To apply the gel, I used a palette knife, but a paint brush or trowel are also some possible tools. The gel is lightweight, non-yellowing and can be used on any support that is suitable for acrylic paints, like canvas, boards, and even paper. You can either spread the gel so that the whole area is covered tightly with beads or as a certain accent for a focus area.

Some time ago, I had already prepared a gallery canvas with some areas of glass beads for a fish painting. When I picked up this canvas now to work with the glass beads, I felt more like painting turtles. I quickly realized that I had to be careful not to push on the brush and painting knife too strongly because some of the beads got loose and fell of the canvas. However, I was able to create a nice texture due to the beads.

detail of "Turtles", on the right bottom you see the top layer of glass beads
Later in the painting process, I spread another layer of glass bead gel on top of some areas of the artwork to create the bubble effect. 

Unfortunately, I was not able to finish the painting in time for this blog because I had to get ready for my painting trip. I will show it to you as soon as possible.

Whether to varnish the finished painting or not is a topic that has been heavily discussed. If you have an artwork with different effects, and sheens, you probably do not want to use an isolation coat and the varnish because they would even them out – something you might not want.

I usually do not varnish my paintings except if I have used absorbent pastes like Crackle Paste. Absorbent mediums should be varnished as this will seal the absorbent areas to avoid dust settling on your painting.

Due to the fact that some of the beads fell off, when I painted over the first coat of the bead gel, I will put a varnish on top of the painting to make sure the surface is better protected.

Before varnishing your painting, you should apply an isolation coat (2 parts by volume Soft Gel Gloss to 1 part water) that creates a permanent, non-removable layer. This layer separates the paint surface from the removable varnish and will protect the painted surface if the varnish is ever removed for cleaning and conservation purposes. It will also seal absorbent areas, which will make it possible to create a more even application of the varnish.

When this blog is published I am already on the spring Plein Air Ensemble painting trip in the Orford-Magog area. I will write all about the trip in my next two blogs.

Please share my blog with family and friends who might be interested in the topics I write about. I appreciate your help in reaching a broader audience.

Friday 24 March 2017

Pumice Gel

His Majesty, Ringo I, mixed media

Blog 12

The first two weeks of this month, I wrote about two different pastes. This week's blog is about Pumice Gel, a gel I love because of its texture. I played around with it on a couple of experimental pieces before I used it for my painting “His Majesty, Ringo I”.

Gels use the same acrylic polymers as acrylic paint. Aside from Pumice Gel, they are excellent adhesives for collage and mixed media pieces, have excellent flexibility and show a resistance to chemicals, water and ultraviolet radiation. Gels can be used to increase the transparency, extend paint, and change the consistency of the acrylic paint (e. g. Extra Heavy Gel) and change finishes (gloss, semi-gloss or matte).

When working with gels, mix your colour first before adding the gel as the gel is white but dries clear. Unlike all the other gels that are colourless, Pumice Gel is opaque. Basically, it is pumice (volcanic lava) added to a gel medium.

Pumice Gels are made with real pumice solids and thick gels. You can buy three different varieties: fine, coarse and extra coarse. They all dry to rough granular grey films that are hard, opaque, and absorbent. They mix well with acrylic paint.

Fine Pumice Gel is perfect to create finely textured surfaces which can be used as a drawing ground for pastels, charcoal and graphite. Coarse Pumice Gel and Extra Coarse Pumice Gel create more coarse textures that look like concrete.

The New Planet, acrylic on coarse pumice gel
To increase flexibility, the Pumice Gel can be mixed with other gels and mediums. If you apply paint on the coarse and extra coarse dried pumice films, you get the appearance of dry brushing.

I hope this month's look at different products has sparked your curiosity. I encourage you to try something different, even if you just play with different products. This is not only fun but will keep you growing your skills. You might find out that you love some but do not really see any use of others in your artworks. You could get an introductory Gel Mediums and Molding Pastes to start in order to avoid spending too much money.

Have you already tried any gels or pastes in your artworks? Would you be interested in attending a workshop to try them out? You can either leave a comment or send me an email to kpeters@domingoinformatics.ca.


Friday 17 March 2017

Greens

Odenwald, Germany, acrylic, 20" x 24"

 
Blog 11

This week, I wanted to give you more information about Pumice Gel, a gel I love because of its texture. However, when I was just about to schedule the blog, I realized that today's blog falls on St. Patrick's Day, a day that just brings to mind a lot of things that are green. While I have never painted or drawn a leprechaun or a shamrock, it made me think right away of my painting “Did you Hear That???”, an acrylic painting of two frogs sitting on lily pads. Even though I created this small painting many years ago, it still makes me smile whenever I see it.

However, I already wrote about this painting two years ago in March. While looking for a different painting to write about, I realized how important the colour green is in my paintings, especially in my landscapes. During the spring, summer and fall there is so much green around us. Something we really yearn for at this time of year when we wish for the arrival of spring but are still getting snow.

Here are just a couple of paintings that are dominated by greens:


Standing Proud, acrylic, 16" x 20"


Beckett's Creek - Fall, acrylic, 14" x 10"

Fall at Beckett's Creek, mixed media, 30" x 40"

Rebecca's Pond, acrylic, 14" x 11"

Green Waters, oil, 12" x 24"

While I love the different shades of green, I have often struggled with the greens in my paintings. It was only after a workshop about Emily Carr that I embraced the colour green. While I usually mix my greens out of the blues and yellows on my palette, I have three tubes of greens that I really love: Golden's Green Gold, a sap green and a turquoise, a colour I use a lot in my Kamouraska paintings.

If you want to get more comfortable with mixing greens, it is a great exercise to create a chart of different colour mixtures. Sometimes, you are surprised by the vibrancy of the mixed colour while other times you find the mixture very dull and subdued. This exercise helps you also to find the right green for the different seasons. Usually, you need a light and bright colour palette for the spring when nature awakens, and a more subdued palette for the fall greens when the reds and yellows are more dominant.

Wishing you a Happy St. Patrick's Day! I hope you will return for next week's blog about Pumice Gel.

Friday 10 March 2017

Molding Paste


The Perfect Fish Tank, acrylic, 16" x 20"


Blog 10

During the month of March, I will give you some information about some pastes and gels I have used in my artworks. This is by no means a complete list of all uses for a certain product. You can find more information on the manufacturer's websites as well as lots of ideas and videos for ideas online.

This week, I look at Molding Paste which I have used on a couple of occasions to create paintings with a 3D effect and textures. Molding Paste can also be used to smooth out a textured surface. The paste dries to a hard, yet flexible, matte and opaque white finish. It holds stiff peaks and can be used to create a highly textured surface. It is very absorbent and therefore suitable as a ground for almost all painting and drawing media.

Most Molding Pastes are water-based products consisting of an acrylic polymer emulsion mixed with marble dust, which give great flexibility and durability. The drying time greatly depends on the thickness of application. They paste can be tinted before application. After drying, acrylic paints and mediums can be applied. The paste can also be used to slightly tint acrylic colours. In this case, it will increase the thickness and rigidity of the paint. There are different varieties of Molding Pastes on the market.

"Just Bite Me", acrylic, 14" x 11"
Light Molding Paste is lighter than the regular molding paste as a low-density filler has replaced the traditional marble dust. This is especially important if you create large artworks with thick applications of molding paste. It has the consistency of cake icing.

Regular Molding Paste creates a flexible film that holds peaks well.

Extra Heavy Gel/Molding Paste is a blend of Extra Heavy Gel Gloss and Molding Paste. Therefore, it contains a lower level of opaque fillers. As a result it dries to a satin, semi-opaque finish. The thick paste retains tool marks better than any other molding paste.

Hard Molding Paste dries to an extremely hard, opaque film that can be carved with hand or power tools. To minimize the chance of cracking, it should be applied in layers of up to 1/4 inch.

Coarse Molding Paste dries to a hard surface with the feel of sandpaper. Up to a thickness of 1/8”, it is translucent.

Molding Paste is best applied with a knife to create the build-up. It works best on a rigid support. On a canvas, it is best to use the Light Molding Paste.

Here are some examples of my artworks that contain molding paste:

So far, I have only tried the regular and light molding paste. Have you tried any of the molding pastes? Do you have a favourite?

Friday 3 March 2017

Crackle Paste

Voluptuous, acrylic, 11” x 14”

Blog 9

As March Break falls into this month, I dedicate this month’s blogs to experimenting with different gels and pastes. Some of the materials are not only great for artists but can be easily used with your children or grandchildren for some creative activities.

This week, I am looking at Crackle Paste, a product I have used in a couple of workshops because it creates a neat mosaic effect.

Crackle Paste is a thick, opaque material that is designed to develop deep fissure-like cracks as it dries. The width of the cracks depends on the thickness of application, the temperature, humidity and airflow. The thicker you apply Crackle Paste, the deeper the cracks will be.

The best way to apply Crackle Paste is with a painting knife to get a nice thick coat onto the surface. Crackle Paste will retain tool marks. The shape of the cracks cannot be influenced as the cracks appear randomly. Generally, most cracking occurs within a day or less, but thicker applications may actually take a couple of days to fully develop all of the cracks. It is best to use Crackle Paste on a sturdy support because paper and stretched canvas will warp.

There are several ways to work with Crackle Paste. You can colour the background before you add Crackle Paste. This way, you will be able to see the colour of the background in the cracks.

You can also start on a white background and add the Crackle Paste out of the jar. The slightly coarse paste dries to a white and hard three dimensional surface. The dry paste is very absorbent. Once the paste is dry you can apply paint. However, try to use thinned paints, washes, or glazes as thick layers of paint will fill the cracks.

Another option is tinting the paste before application with acrylic paints. This is what I did for my one-day workshops when we did not have the time to wait for the paste to dry. To avoid reducing the cracking ability, the amount of paint should not exceed more than 10%.

You can add gels to your paints. A matte gel will help to increase the film strength and reduce the absorbency but will not alter the appearance of the Crackle Past. If you would like to change appearance you could choose a glossy version. It would be a fun experiment to test different gels on one prepared substrate to see the differences side by side.

The finished painting should be sealed with a medium and then varnished to avoid dirt from setting on the highly absorbent surface. and the cracks. A 2:1 Soft Gel (Gloss) water mixture works well. If you would like to keep the matte appearance you should pick a matte varnish.

If you want to preserve the look of your image for eternity, it is advisable to add Titanium White (up to 10%) to the Crackle Paste to avoid yellowing. Yellowing will be especially noticeable if you applied light colours on top of the Crackle Paste. The use of a varnish containing UV Light Stabilizers will also help to reduce the amount of harmful UV light reaching the Crackle Paste.

Have you used Crackle Paste before? I would love to see some of your artworks with Crackle Paste.

If you enjoy my blogs, please share them with family and friends. Thank you in advance for helping me to increase my audience.